Computer processor upgrade.
Step by step instructions.
When doing a computer processor upgrade, you have to keep a couple of things in mind.
It is fairly simple to replace a CPU, but if you replace it the wrong way or with a wrong CPU type, you will damage the processor.
So, you are ready for a CPU upgrade. Your current CPU is old and you want to add a faster CPU.
Where do you start? Yep, you guessed it, the motherboard manual.
Below is an extract of an old motherboard manual I had some time ago. I only captured the CPU info from the manual.
Computer processor upgrade manual
If you look at the above information, you will notice that this motherboard supports the Pentium and Celeron range of CPU's.
This is important because when you want to upgrade your CPU it has to be one of these types.
If your existing CPU is a Celeron, then computer processor upgrade would be a good idea. Celeron's clock speed weren't the best you'd find and the L1 and L2 caches were not that great.
If you had a slower Pentium CPU then upgrading to a faster model would be a good idea.
Remember one thing, don't just do a computer processor upgrade because you think you need a faster one.
Adding another gigabyte of ram or a bigger and faster SATA hard disk would do the trick.
I once added a faster graphics card with more video memory to an old PC and that boosted the performance without the need to upgrade the CPU. The application that I used needed a good graphics card and that's what I upgraded.
Look at what's needed before you just start to upgrade components. A system you bought 2 years ago might run better with a couple more DIMM's in dual channel mode.
It all depends.
Let's get back to the computer processor upgrade. You will also see, from the manual, what socket type you should get for the CPU.
In this example the motherboard supports a socket 478 which is a PGA or Pin Grid Array type CPU. So, the CPU has pins that slot into a Zero Insertion Force or ZIF socket.
Armed with this info you can easily buy a suitable processor for the upgrade.
Let's have a look at the steps:
1. Connect your antistatic wrist strap to the computer or a suitable grounding component.
2. Open the computer case and place it on a table. It's easier to work like this.
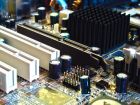
3. Locate the CPU slot on the motherboard. You can get this info from the motherboard. It will show you exactly where the CPU is located on the motherboard.
CPU location on motherboard
The above diagram shows the processor location on the motherboard. On some manuals they will show an actual picture of the motherboard with the CPU location. In the above example the processor is located to the right of the memory slots.
4. This point is very important. On all CPU's there will be a mark that shows you how the CPU should be orientated on the motherboard.
If you insert the CPU incorrectly, you may damage the CPU. This is especially true for pin grid array (PGA) processors. Below is an example of the marking on our CPU.
CPU mark for orientation in socket
In the above example, there is a gold mark with a black dot on the CPU. This tells you how the CPU should be positioned in the processor slot on the motherboard.
The above is an example. Some CPU, like land grid array (LGA) type, might have a gold mark and notches on the CPU. This will ensure that the processor is inserted correctly in the socket.
5. Open the lever that locks the CPU in place in the socket.
CPU lever socket 478 PGA
6. Position the processor correctly over the slot. Remember the markings on the processor will correspond to the marking on the slot.
Below is a picture showing the CPU pins. Notice that on one corner there is a pin missing. This will allow the CPU to be inserted in only one way.
Computer processor upgrade PGA pins
Also remember, that this is a zero insertion force socket. This means that the CPU will easily "glide" into the slot. You don't need to press down on the CPU when you do the computer processor upgrade.
CPU position over slot
7. Once the CPU is in the slot, you need to close the lever to secure the processor in the socket.
CPU lever in closed position
8. You must now fit the heatsink and fan on top the CPU. This procedure depends on the heatsink and fan manufacturer, and you sometimes wouldn't find it in the motherboard manual.
When you bought the CPU, the CPU cooler (fan and heatsink), will ship with the package. You will also find the instructions on how to fit these components with the package.
Below is a picture of what the CPU cooler would look like for the socket 478 CPU in this example.
CPU cooler. Fan and heatsink. Socket 478
To fit this type of CPU cooler, you would mount the cooler over the CPU onto the motherboard. Notice the four captive screws located on each corner of the processor.
These four screws would then screw into the motherboard to secure it to the motherboard.
Below is another example of a CPU cooler. This is the LGA 775 type.
CPU cooler. Fan and heatsink. Socket 775
These types of coolers just press down onto the motherboard with a clip that snaps into place when you press on it. It's a fairly straightforward procedure.
Second last thing that you need to do, when doing a computer processor upgrade, is connect the power cord of the cooler to the motherboard.
There should be a connector located on the motherboard for this. Check your motherboard manual if you cannot find the connector.
9. Put the cover back on the PC and switch on. Check the bios for any errors. Check that the speed of the CPU corresponds to what you have upgraded to.
I have used the socket 478 CPU as an example. The LGA sockets works more or less the same. The big difference is that the LGA does not have pins.
You only place the CPU in the socket, and press down on the lever to close it. The CPU has notches that will only fit in the socket in a specific way. So, you can't insert it incorrectly.
Below is a picture of a LGA CPU showing the notches.
LGA Socket 775 notches
Remember, always go to the manufacturers website if you are unsure on how to mount these processors.
They will have detailed procedures and drawings. I always go to the Intel website when I do a computer processor upgrade, just to make sure.
Return from Computer Processor Upgrade to Computer Hardware Upgrade
Back to What is My Computer